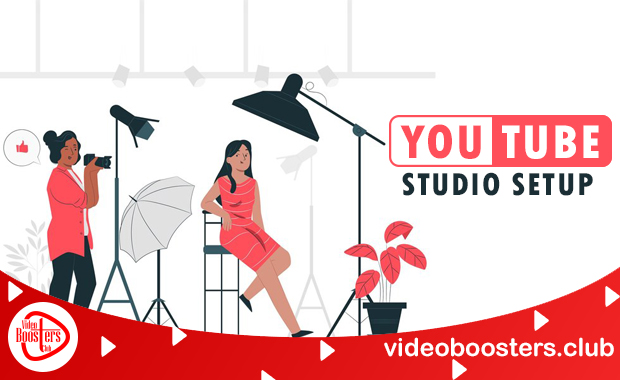
Creating quality content on YouTube has become a powerful way to share knowledge, entertain, and even build a business. A professional YouTube studio setup can significantly enhance the quality of your videos and increase views on YouTube. Whether you are a beginner or an experienced YouTuber, understanding how to optimize your studio is essential for a successful YouTube channel.
Your YouTube studio setup doesn’t need to break the bank. With some creativity and strategic planning, you can create a professional-looking setup that aligns with your content style and goals. From choosing the right lighting to selecting high-quality microphones, this guide will walk you through the best ideas and pro tips to elevate your YouTube content.
In this comprehensive article, we will explore everything from what a YouTube studio entails to actionable steps for creating your ideal workspace. Let’s dive into the details.
What is YouTube Studio?
A YouTube studio refers to the physical space or environment you create to record videos for your channel. It’s designed to enhance video quality, ensure consistency, and reflect your brand’s identity. A good YouTube studio setup not only improves your video production process but also engages your audience better.
Key Components of a YouTube Studio
Lighting
For videos to be clear and appear professional, the lighting must be right. Ring lights, softbox lights, or natural light can work wonders depending on your content style.
Camera
While smartphones can produce excellent video quality, investing in a DSLR or mirrorless camera can offer more control and superior results.
Audio Equipment
High-quality sound is just as important as visuals. External microphones, such as lavalier or shotgun mics, can dramatically improve audio clarity.
Background and Props
The backdrop of your videos should be clean, aesthetically pleasing, and relevant to your niche.
Editing Software
Tools like Adobe Premiere Pro or Final Cut Pro can help you refine your videos and add professional touches.
Whether you’re creating a tech review channel, vlogging, or teaching tutorials, your YouTube studio setup should cater to your content’s unique requirements.
Best Ideas and Pro Tips To Get The Best YouTube Studio Setup
1. Choose the Right Space
Selecting the right space for your YouTube studio setup is the foundation of a successful video production process. Select a peaceful space with plenty of natural light and few outside interruptions. If you’re working with a smaller space, consider multi-purpose furniture and creative layouts to maximize functionality.
Tips for Selecting Your Space:
- Ensure good acoustics to reduce echo and background noise. Rooms with carpets, rugs, or upholstered furniture often provide better sound quality.
- Use soundproofing materials like foam panels, heavy curtains, or door seals to block out external noise.
- Choose a room with enough electrical outlets to accommodate your lighting, camera, and other equipment. Surge safeguards and extension cords can assist in controlling power needs.
- Plan for adaptability. Your needs may change over time as your channel grows, so select a space that can evolve with you.
2. Lighting Setup
Your video’s lighting can either enhance or spoil its quality. Poor lighting cannot be compensated for by even the greatest cameras. Soft, diffused light works best for most setups, as it minimizes harsh shadows and creates a flattering appearance.
Popular Lighting Options:
| Type | Benefits | Example Uses |
| Ring Light | Eliminates shadows, creates even lighting | Beauty tutorials |
| Softbox Light | Provides diffused and natural-looking light | Interviews |
| LED Panels | Adjustable brightness and color temperature | Gaming setups |
Lighting Placement Tips:
- Position your lamp 45 degrees to the side of your face to avoid direct light on your face and get the best pictures.
- Ensure that there are key, fill and back lights so that you can come up with the three point lighting system.
- To reduce intense illumination and prevent glare, use diffusers. In places that are more dark, reflectors serve to reflect light.
- Experiment with colored lighting for a unique and dynamic background effect.
3. Invest in Quality Audio Equipment
Your audience will forgive slightly imperfect visuals, but poor audio can drive them away. Purchase a top-notch microphone to record crystal-clear audio. Depending on your content style, you can choose from several types of microphones:
Types of Microphones:
Lavalier Microphones
Small and discreet, ideal for interviews and tutorials where mobility is important.
Shotgun Microphones
Highly directional and perfect for reducing background noise in controlled environments.
USB Microphones
Convenient and versatile for desktop setups and live streaming.
Dynamic Microphones
Durable and effective for noisy environments or podcast-style recordings.
Pro Tips for Audio Setup:
- To lessen plosive noises and wind disruption, apply a pop filter or windscreen.
- Monitor audio levels with headphones during recording to identify issues in real-time.
- Turn off fans, air conditioners, and other equipment to reduce noise in the background.
- Test your audio equipment thoroughly before recording to ensure consistent quality.
4. Optimize Your Background
The tone of your video is established by your background, which also conveys the essence of your brand. A clutter-free and visually appealing background is crucial for keeping viewers engaged.
Ideas for Backdrops:
Plain Wall
A simple, clean look that works for any niche. You can add a splash of color with a painted accent wall.
Decorated Shelves
Display relevant items like books, plants, or awards that complement your content.
Custom Backdrops
Use green screens or branded banners to create a unique and versatile background.
Themed Decor
Incorporate elements that match your niche, such as gaming posters for a gaming channel or art supplies for a creative channel.
Tips for a Professional Background:
- Keep your background well-lit to avoid shadows or dullness.
- Avoid overly busy or distracting elements that could take attention away from your content.
- Regularly update or refresh your background to keep it relevant and interesting.
5. Camera Selection and Setup
Your camera is the heart of your YouTube studio setup. While smartphones can produce high-quality videos, upgrading to a DSLR or mirrorless camera offers better control over focus, depth of field, and image quality.
Camera Options:
Smartphones
A cost-effective option with excellent video quality, especially for beginners.
DSLR Cameras
Ideal for cinematic videos with adjustable settings and interchangeable lenses.
Mirrorless Cameras
Lightweight and versatile, suitable for a wide range of content.
Webcams
Perfect for live streams or desktop recording with minimal setup.
Tips for Camera Setup:
- Use a sturdy tripod or mount to keep your shots steady and professional.
- Adjust the resolution to at least 1080p, or 4K if possible, for a crisp and clear image.
- Try a variety of viewpoints and angles to give your videos more visual appeal.
- To achieve constant focus, white balance, and exposure, use manual settings.
6. Add Personal Branding
Incorporate elements of your personal brand into your setup. This helps viewers associate your content with your unique identity.
Ideas for Branding:
- Display your logo prominently in the background or as a watermark.
- Use consistent colors and themes in your decor, props, and lighting.
- Include props or items that reflect your niche, such as cooking utensils for a food channel or tech gadgets for a tech review channel.
- Create a signature style, such as a specific type of lighting or a unique camera angle, to make your videos instantly recognizable.
7. Streamline Your Workflow
Efficiency is key to producing high-quality videos consistently. Organize your equipment and plan your shoots in advance to save time.
Tools to Enhance Workflow:
Cable Management
Use velcro straps, clips, or cable sleeves to keep cords tidy and prevent tripping hazards.
Video Editing Software
Invest in tools like Adobe Premiere Pro, Final Cut Pro, or free options like DaVinci Resolve to refine your videos.
Checklist
Create a pre-shoot checklist to ensure all equipment is functioning and ready to go.
Cloud Storage
Backup your files regularly to avoid data loss and facilitate collaboration with editors.
Pro Workflow Tips:
- To increase productivity, record several videos at once.
- Use templates for editing to maintain consistency across your content.
- Schedule regular maintenance for your equipment to prevent technical issues.
8. Test and Evolve
Your YouTube studio setup will evolve as your channel grows. Regularly test your setup to identify areas for improvement.
Key Metrics to Monitor:
- Viewer engagement and feedback to assess video quality and style.
- Lighting and audio quality in recorded videos to ensure professional standards.
- Ergonomics and comfort during long recording sessions to avoid fatigue.
Ideas for Continuous Improvement:
- Experiment with new equipment, techniques, or layouts.
- Seek guidance from famous creators in your niche.
- Keep updated on the most recent developments in video production technology and trends.
Conclusion
Building the perfect YouTube studio setup is an ongoing journey. By focusing on the essentials, experimenting with different ideas, and integrating professional tips, you can create a studio that enhances the quality of your videos and resonates with your audience.
Whether you’re starting with a basic setup or investing in advanced equipment, remember that the most important element is your creativity and dedication. Use this guide as a foundation to develop a studio that aligns with your goals and grows with your channel. With the right YouTube studio setup, your content will not only stand out but also leave a lasting impression on your viewers.